


|
| ||||||||
|

|
|
Copy Icon |
|
Image sizes: 512x512, 256x256, 64x64, 48x48, 32x32, 24x24, 20x20, 16x16
File formats: BMP, GIF, PNG, ICO
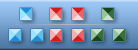
Painting Pictures with Aqua Effect
Creating a fresh new image having the familiar "aqua" effect is easier than you think – if you use proper tools. You can make an icon from scratch by only using a free, small and lightweight icon editor.Drawing a fresh new icon featuring the renowned "aqua" effect is easier than you think – if you have proper tools. To draw an image from scratch, a professional, small and simple icon editor such as IconLover 5 (aha-soft.com) is all you really need.
For example, let us draw an aqua-style icon for "Add", a glass ball with a "plus" sign inside. First, you’ll need to draw a circle of a chosen color. Pick the color you want from the Color properties menu. By the way, you can always memorize a color by adding it to Custom Colors; this comes very handy if you need to draw a matching set of images.
Using the Transparency bar or one of the Transparency presets, define your new icon’s opacity. For this tutorial, the ball will be fully opaque. In the same way, you can specify background color; for simplicity’s sake, we’ll keep the background transparent for now.
To make a circle of selected color, select the Filled Ellipse tool by clicking the Filled Ellipse button in the Tools menu, which is on the left of the drawing area. Holding your left mouse button down, move the mouse cursor within the drawing area to create an ellipse. The ellipse changes its size as you move the mouse. To create a perfectly round circle, hold Shift while drawing. That’s it, you have just drawn a circle!
To add volume and dimension to the flat circle, we’ll need to apply some special effects. There are tons of those built into IconLover! You can add shadows, gradients, transparency masks, and of course, the renowned ‘glass reflection’ look employed by the aqua effect.
To make an icon matching Apple’s Aqua style, you’ll need to add a reflection and a shadow to the circle. This can be done quite easily altogether by simply selecting Aqua from the Effects menu. Keep all sliders at their defaults for now, and you’ll get a beautiful shiny sphere as a result.
Now let’s add an artist’s touch and make your icon truly unique. Go back to that Aqua dialog and have a carefull look at the properties. There are plenty of properties available to adjust, allowing you to draw something never seen before. Go ahead and move the sliders to see how your icon can look!
As a final touch, let’s add some volume to your new icon. While glowing and shiny, it still looks more like a lens rather than a crystal ball. Let’s fix that by throwing a drop-down shadow! To apply a shadow effect to the icon, click "Drop shadow" from the Effects menu. You can stick to defaults, or move the settings around by getting a flat button, a lens, or a ball. The look depends on the size of the shadow, its distance from the subject, and the angle at which it falls to the ground.
To add the ‘plus’ sign into the image, click on the Text tool icon in the left Tools menu or press "T" to invoke the text properties window. Make sure the "Image transparency" box is ticked. This box means that your text will not be transparent, only the area around it will be. Tweaking the "Use semi-transparency" setting gets your text the same level of transparency your primary color has. Type "+", and you’ll get the ‘plus’ sign embedded into the ball.
That’s it! You’ve just created a crystal ball that matches the famous Aqua style! All you needed was a professional icon editor, IconLover 5, a few clicks and a few minutes of your time. Easy!
Copyright © 2006-2022 Aha-Soft. All rights reserved.
|